Here are the main steps to creating a Chocolatey Installer
1. Click the New Project Icon
![]()
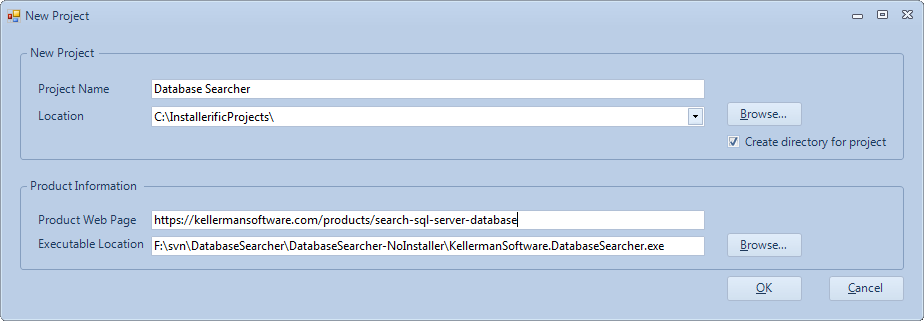
2. Fill in the New Project Information. After clicking OK Installerific will automatically parse your website url and file exe to pull relevent information about your product.
- The Project Name is the name of the Installerific project, it can be different than the product name
- The Location is where to save the Installerific project
- The Product Web Page is the Website URL for your product.
- The Executable Location is the file location for the main exe for your product.
3. Click the Build Chocolatey icon
![]()
4. Say yes to run as admin.

5. You will receive a dialog of the missing fields required by Chocolatey
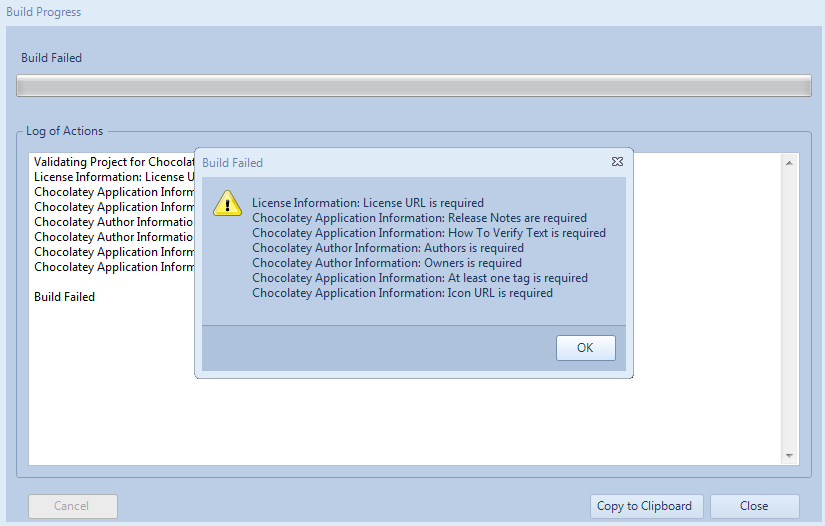
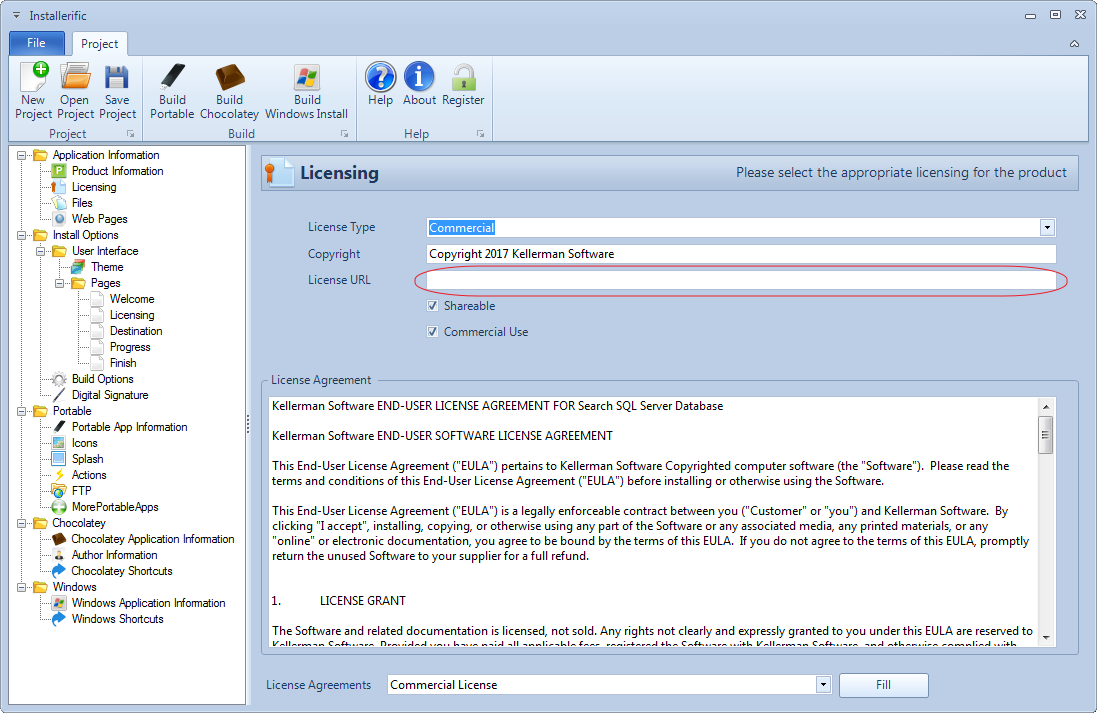
The licensing URL is required by Chocolatey. You will need to upload your license to your website and then reference it here.
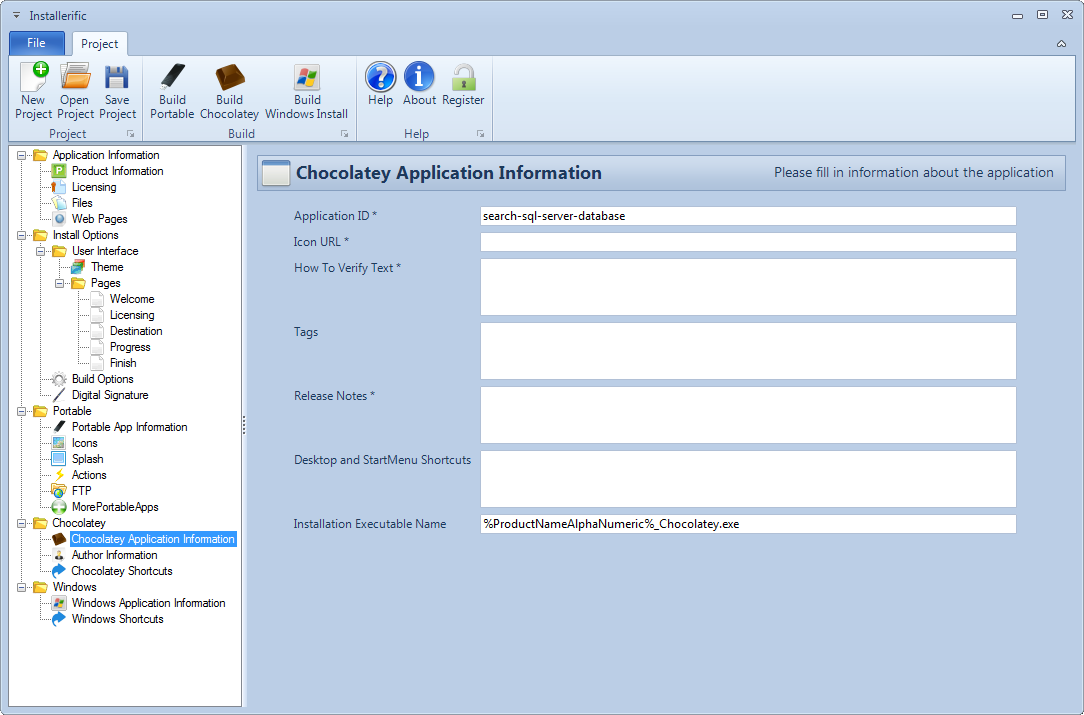
There are several fields required in the Chocolatey Application Information Screen.
- Icon URL - You will need to upload the image to your website. The image must be a PNG and it must be at least 128x128.
- How to Verify Text - This is a note to the Chocolatey admin how he is supposed to know this is a valid package. Example: This chocolatey package was created by Acme Inc who is the copyright holder of the software. Here is the web page for the software: http://www.acmeinc.com/mysoftware
- Tags - This is a list of space or comma delimited tags. Use only alphanumeric for the tags. Special characters such as hypens or underscores are allowed but they do not work on the chocolatey website.
- Release Notes - These are the changes in this release of the software
- Installation Executable Name - This is the name of the installation executable.
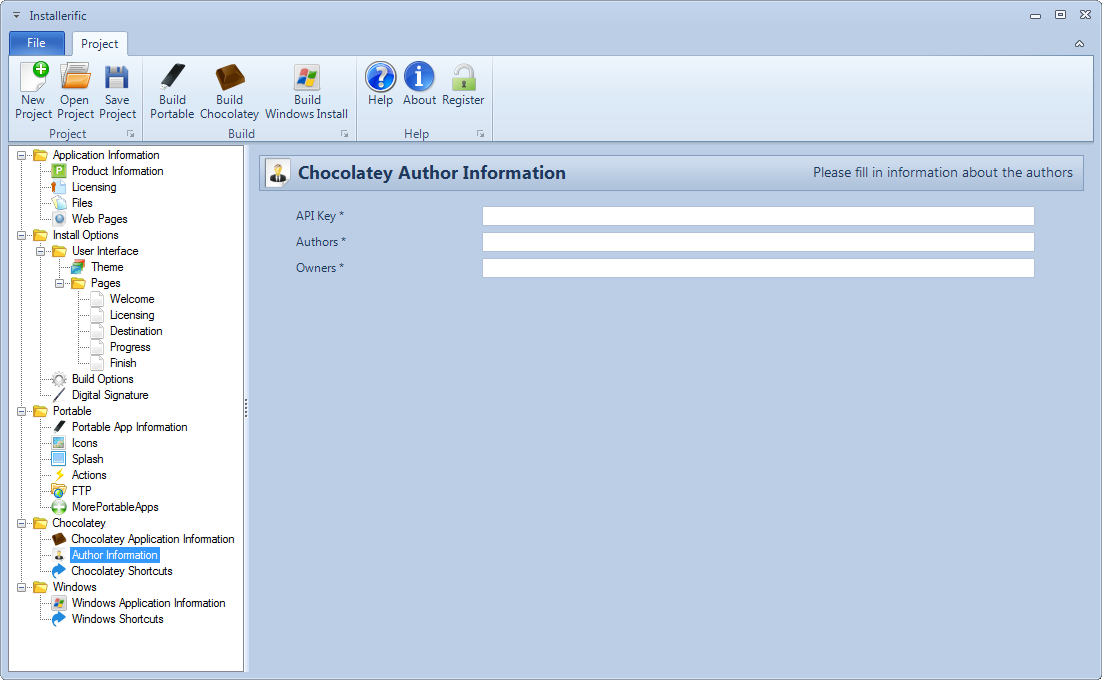
All fields on the Chocolatey Author Information are required.
- API Key - After registering with Chocolatey, go to your account page and get the API key. https://www.chocolatey.org/account
- Authors - Enter your Username for Chocolatey here
- Owners - Enter your Username for Chocolatey here
6. After correcting the errors, build again.
![]()